I was in the middle of a frantic Tuesday night, the kind where the pantry looks like a war zone and my cravings are screaming louder than the traffic outside. I had a half‑ripe banana begging for redemption, a jar of peanut butter that had been staring at me from the shelf for weeks, and a sudden, unapologetic urge to create something that would make my roommates question their entire dessert history. The kitchen was a symphony of clanking pans, the oven humming like a contented cat, and the faint smell of burnt toast from earlier that day reminding me that I was still human. I dared myself to turn those lonely ingredients into a masterpiece, and what emerged was a cake so moist it practically weeps a little peanut‑butter‑kissed glaze every time you cut into it.
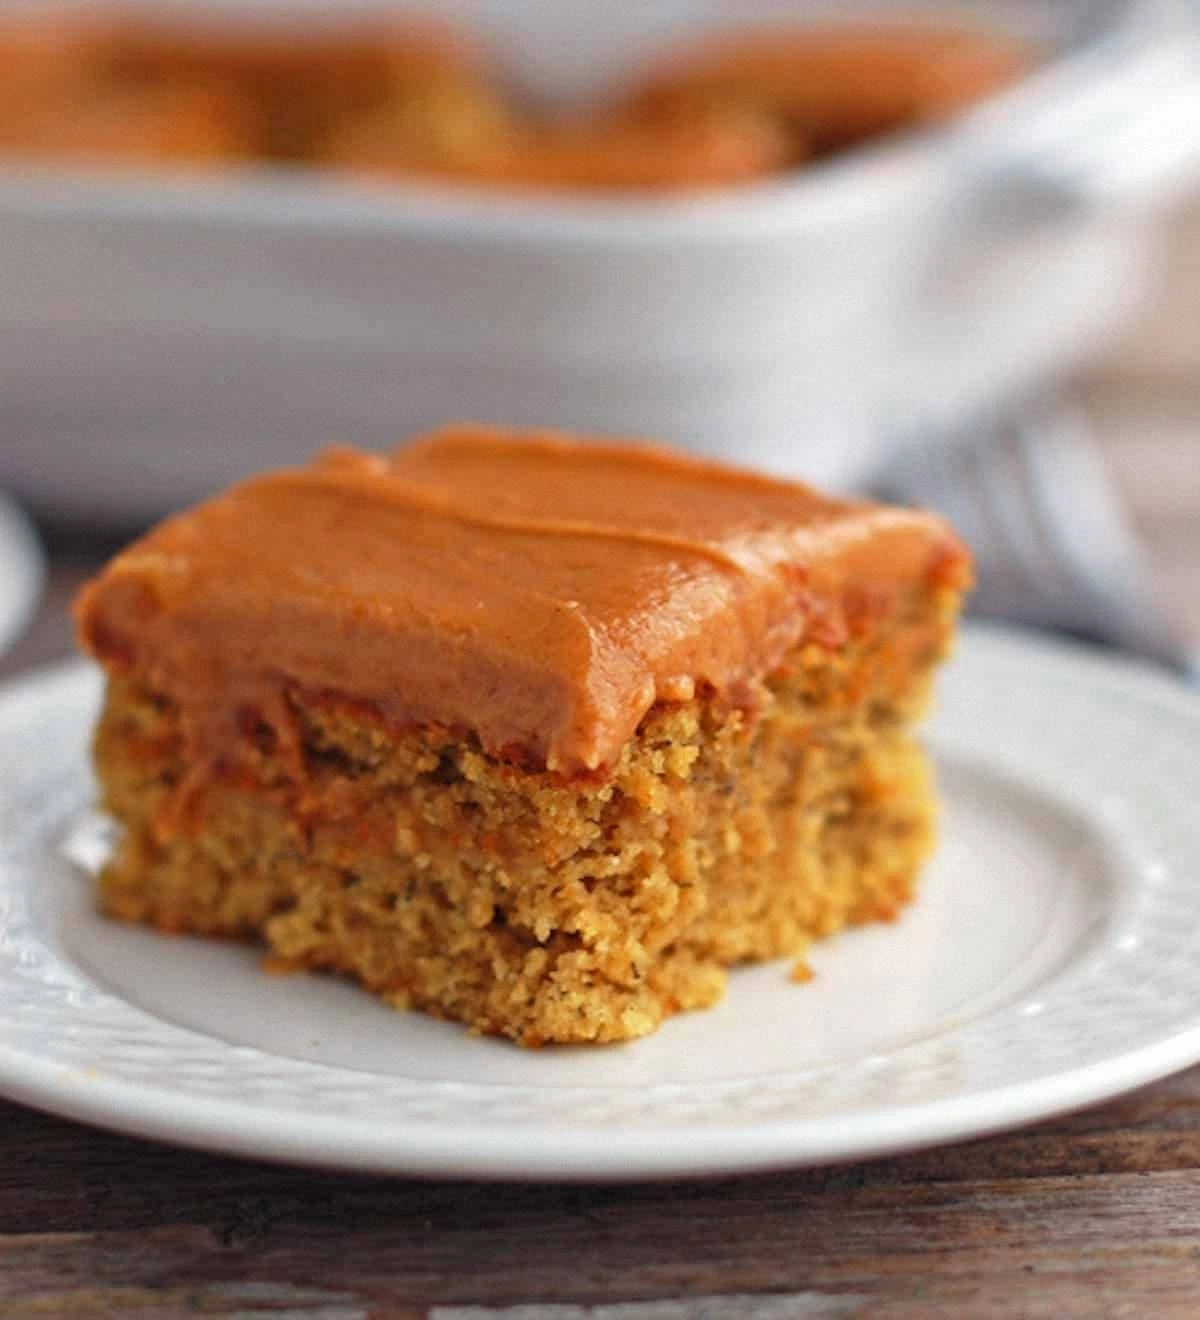
Picture this: a golden‑brown loaf rising in the oven, the batter bubbling at the edges like a gentle volcano, while the aroma of ripe bananas and toasted peanuts swirls together, hugging the room in a warm, nutty blanket. When you finally pull it out, the crust is just the right amount of crisp—think of it as the satisfying snap of a fresh apple, but sweeter. The interior? A tender, almost buttery crumb that feels like a cloud made of caramelized banana, with pockets of peanut butter that melt into silky ribbons as soon as they meet the heat. I’ll be honest — I ate half the batch before anyone else got to try it, and that’s the kind of confession that tells you exactly how addictive this cake truly is.
Most banana‑cake recipes get the texture wrong: they’re either dry like a desert or soggy like a damp sock. Most also treat peanut butter as an afterthought, a drizzle that never truly integrates. Not this one. I’ve cracked the code by folding the peanut butter directly into the batter, letting it emulsify with the bananas and butter, creating a uniform flavor that’s as consistent as a well‑tuned orchestra. The secret weapon? A splash of milk that keeps the crumb light, and a dash of vanilla that lifts the whole thing into a higher plane of deliciousness. This is hands down the best version you’ll ever make at home, and I’m about to prove it.
Okay, ready for the game‑changer? I’m going to walk you through every single step — from selecting the perfect bananas to mastering the frosting swirl that looks like a work of art. By the end, you’ll wonder how you ever settled for any other banana cake. I dare you to taste this and not go back for seconds. Let’s get started.
What Makes This Version Stand Out
- Moisture: The combination of mashed bananas, melted butter, and a splash of milk creates a crumb that stays soft for days, like a hug that never ends.
- Peanut‑Butter Integration: By folding peanut butter directly into the batter, every bite delivers a consistent nutty richness, not just a surface glaze.
- Texture Contrast: The crust forms a gentle, caramelized edge that cracks just enough to give way to the pillowy interior, offering a satisfying bite.
- Simplicity: Only nine pantry staples plus a few frosting ingredients are needed, making it perfect for a weekday treat without a grocery run.
- Crowd Reaction: This cake has a habit of clearing plates in seconds; even the most disciplined dieters surrender to its charm.
- Ingredient Quality: Using ripe, almost‑overripe bananas and a high‑quality, natural peanut butter elevates the flavor profile dramatically.
- Cooking Method: A single‑sheet pan ensures even heat distribution, preventing the dreaded soggy center that haunts many banana cakes.
- Make‑Ahead Potential: The frosting stays firm at room temperature, so you can prep it a day ahead and assemble right before serving.
Inside the Ingredient List
The Flavor Base
Bananas are the heart of this cake. Their natural sugars caramelize during baking, giving you that deep, almost‑butterscotch flavor without any added syrups. If you skip them, you lose the signature aroma that makes the kitchen feel like a tropical bakery. Choose bananas that are heavily speckled, almost black, because the starches have fully converted to sugars, delivering maximum sweetness and moisture.
Peanut butter isn’t just a topping; it’s a flavor conduit. Its oils blend with the butter, creating a richer mouthfeel that coats the palate like velvet. Opt for a natural, unsweetened variety to keep the sugar balance in check. If you prefer a crunchier texture, stir in a handful of chopped peanuts just before baking.
The Texture Crew
All‑purpose flour provides the structural backbone. It’s the canvas on which the bananas and peanut butter paint their flavors. Swapping it for whole‑wheat will make the crumb denser and the flavor earthier—great for a rustic twist, but not for the classic version. For a lighter crumb, you can replace a quarter of the flour with cake flour, which has a lower protein content.
Baking soda and baking powder are the leavening duo that gives the cake its rise. Baking soda reacts with the acidity of the bananas, while baking powder adds an extra lift. Using too much of either will cause the cake to dome and then collapse; stick to the listed amounts for a perfect, even rise.
The Unexpected Star
A splash of milk might seem trivial, but it’s the secret to a tender crumb. Milk hydrates the flour proteins just enough to keep the cake from becoming rubbery. If you’re dairy‑free, almond milk works just as well, adding a subtle nutty undertone that compliments the peanut butter.
Vanilla extract is the aromatic whisper that ties everything together. It amplifies the banana’s natural fragrance and smooths the peanut butter’s robustness. A high‑quality pure vanilla extract makes a noticeable difference; artificial vanilla can leave a metallic aftertaste.
The Final Flourish
The frosting is a dream‑team of cream cheese, peanut butter, and powdered sugar. Cream cheese adds a tang that cuts through the sweetness, while powdered sugar gives the frosting its glossy finish. If you want a less sweet version, reduce the powdered sugar by a quarter and add a pinch of sea salt.
Butter in the frosting creates that melt‑in‑your‑mouth silkiness. It also stabilizes the frosting, allowing it to hold its shape when sliced. For a vegan version, swap butter and cream cheese for coconut cream and a plant‑based cream cheese alternative.
Everything's prepped? Good. Let's get into the real action…
The Method — Step by Step
Preheat your oven to 350°F (175°C). While the oven warms, grease a 9‑by‑13‑inch baking pan with a thin layer of butter and dust it with a tablespoon of flour; this prevents the cake from sticking and adds a subtle crust. The pan should feel warm to the touch—if it’s too cold, the batter will cling and bake unevenly. Power transition: Okay, ready for the game‑changer?
In a large mixing bowl, whisk together the flour, baking soda, baking powder, salt, and cinnamon. This dry blend should look like a fine, even dust that promises a uniform rise.
Kitchen Hack: Sift the dry ingredients twice for an extra airy texture; the double‑sift removes any clumps and incorporates air.In a separate bowl, melt the butter over low heat, then whisk in the sugar until the mixture looks glossy and the sugar begins to dissolve. This step is crucial because a fully dissolved sugar ensures a smoother crumb. Once combined, let the mixture cool for a minute so the eggs don’t scramble when added.
Add the eggs one at a time, beating well after each addition. The batter should thicken slightly and become pale. Then stir in the mashed bananas, milk, vanilla, and the star of the show—peanut butter. Mix until the batter is uniform; you’ll notice a slight swirl of peanut butter that should disappear within a minute.
Watch Out: Over‑mixing at this stage can develop gluten, leading to a tougher cake. Stop mixing as soon as everything is just combined.Gradually fold the dry ingredient mixture into the wet batter. Use a rubber spatula and a gentle “cut‑and‑fold” motion; this preserves the air you’ve incorporated. The batter will look slightly lumpy—that’s perfectly fine. If you see streaks of flour, keep folding until they disappear, but don’t over‑work.
Pour the batter into the prepared pan, spreading it evenly with the spatula. The surface should be smooth, with a slight dome in the center. Tap the pan lightly on the counter three times; this releases any trapped air bubbles that could cause uneven pockets.
Slide the pan into the preheated oven. Bake for 30‑35 minutes, or until a toothpick inserted into the center comes out clean with just a few moist crumbs. Around the 20‑minute mark, the edges will start pulling away from the sides of the pan—this is your visual cue that the cake is developing that coveted caramelized crust.
While the cake bakes, prepare the frosting. Beat the softened cream cheese, peanut butter, and butter together until light and fluffy—about 2 minutes on medium speed. Slowly add the powdered sugar, one cup at a time, beating until the mixture is smooth and glossy. Finish with a splash of vanilla and a pinch of salt to balance the sweetness.
When the cake is done, let it cool in the pan for 10 minutes, then turn it onto a wire rack to cool completely. This prevents the frosting from melting into a soggy mess. Once cool, spread the frosting in a generous, even layer, using an offset spatula to create a swirl that looks as good as it tastes. And now the fun part: Slice, serve, and watch your guests’ faces light up.
That's it — you did it. But hold on, I've got a few more tricks that'll take this to another level…
Insider Tricks for Flawless Results
The Temperature Rule Nobody Follows
Never bake a banana cake straight from the fridge. Let the batter sit at room temperature for 10‑15 minutes before it hits the oven. This small pause allows the leavening agents to activate uniformly, preventing a dense center. I once tried skipping this step and ended up with a cake that resembled a rubbery pancake—trust me, it’s not pretty.
Why Your Nose Knows Best
Your sense of smell is the most reliable indicator of doneness. Around the 25‑minute mark, you’ll notice a sweet, nutty perfume wafting from the oven, signaling that the caramelization is happening. If the scent turns slightly burnt, pull the cake out immediately; the crust can go from perfect to overcooked in seconds.
The 5‑Minute Rest That Changes Everything
After the cake has cooled on the rack, let it rest for an additional five minutes before frosting. This short pause lets the crumb settle, so the frosting doesn’t sink in and make the top soggy. My friend tried frosting immediately and ended up with a gummy surface—lesson learned.
Frosting Consistency Hack
If the frosting feels too thick, whisk in a tablespoon of milk or heavy cream. This gives it a silky glide without compromising stability. Conversely, if it’s too runny, add an extra quarter cup of powdered sugar and beat until firm.
Slice Like a Pro
Use a serrated knife dipped in hot water for each cut. The heat creates a clean slice through the dense crumb, preventing the cake from crumbling. This simple trick makes each piece look as polished as a bakery slice, and it’s especially useful when you’re serving a crowd.
Creative Twists and Variations
This recipe is a playground. Here are some of my favorite ways to switch things up:
Chocolate Swirl Delight
Add ¼ cup of cocoa powder to the dry ingredients and swirl in a chocolate ganache after frosting. The bitter chocolate balances the sweet banana‑peanut combo, creating a sophisticated flavor duet that will impress coffee‑drinking friends.
Tropical Coconut Burst
Replace the milk with coconut milk and fold in ½ cup toasted coconut flakes. The coconut adds a fragrant, island‑vibe that pairs beautifully with the nuttiness of peanut butter, turning the cake into a mini vacation.
Spiced Autumn Version
Swap the cinnamon for a blend of pumpkin spice and add a tablespoon of pumpkin puree to the batter. This variation is perfect for cooler months, delivering warm, comforting notes without sacrificing the banana base.
Vegan Friendly
Use a plant‑based butter, a flax‑egg mixture (1 tbsp ground flaxseed + 3 tbsp water per egg), and a vegan cream cheese alternative for the frosting. The result is just as moist and flavorful, proving that dairy‑free can still be decadent.
Nut‑Free Alternative
If peanuts are off the table, substitute the peanut butter with sunflower seed butter. It mimics the creamy texture while offering a slightly earthier taste, keeping the cake accessible to those with nut allergies.
Storing and Bringing It Back to Life
Fridge Storage
Cover the cake tightly with plastic wrap or store it in an airtight container. It will stay fresh for up to five days, and the frosting actually firms up, making each slice easier to handle. If the cake seems a bit dry after a few days, brush the top with a light drizzle of milk before serving.
Freezer Friendly
Wrap individual slices in parchment paper, then place them in a freezer‑safe bag. They’ll keep for up to three months. To reheat, microwave a slice for 20‑30 seconds, or let it thaw in the fridge overnight and warm gently in a 300°F oven for ten minutes.
Best Reheating Method
Add a tiny splash of water (about a teaspoon) to the slice before microwaving; the steam revives the crumb, making it feel freshly baked. For oven reheating, tent the cake with foil to prevent the frosting from melting while the interior warms through.